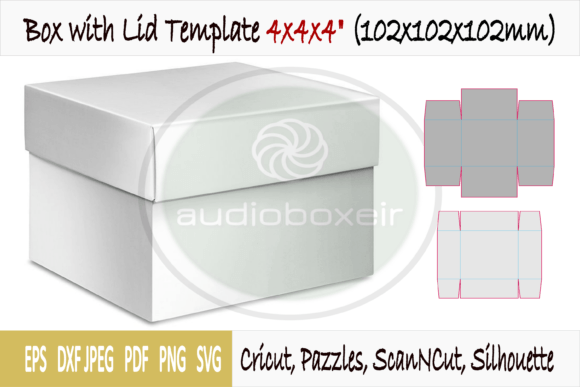
Box with Lid Template
Creating custom packaging is one of the most effective ways to elevate a brand or add a personal touch to a gift, yet many people assume it requires expensive machinery or professional design skills. A Box with Lid Template changes that narrative entirely. It is a digital file type—typically provided in formats like ZIP, PDF, SVG, DXF, and EPS—that allows you to generate precise, 4x4x4 inch boxes at home. These templates are designed for immediate use with standard printers or cutting machines such as Cricut, Silhouette, Scan N Cut, and Pazzles.
The appeal lies in its simplicity and versatility. You do not need to be an engineer to assemble these structures. The process is straightforward: print, cut, fold, and paste. Within minutes, you can have a sturdy, reusable container suitable for plates, pottery, novelties, mugs, cups, stemware, china, clocks, bowls, wine glasses, salad bowls, candies, chocolates, desserts, and much more. However, while the concept is simple, executing it without common pitfalls requires attention to detail regarding dimensions, material choice, and file format selection.
Understanding Dimensions and Inner Measurements
One of the most frequent errors when using any box template is misunderstanding how dimensions are defined. In this specific template, the stated length, width, and height (4 inches each) refer to the inner dimensions. This is a critical distinction that often leads to frustration if overlooked.
If you plan to place a 4-inch wide ceramic plate inside, you might find it does not fit because the wall thickness of the box adds to the overall external size. Conversely, if you assume the box will be exactly 4 inches on the outside, your contents may slide around loosely, compromising stability during transport. To avoid this, always measure your actual item first. If your object is 3.75 inches wide, a box with 4-inch inner dimensions provides a snug but safe fit. Always leave a small margin of clearance—typically 1/8 to 1/4 inch—to account for minor printing variances and folding bulk.
When selecting your paper stock, remember that thicker cardstock increases the internal volume reduction slightly due to the fold lines taking up space. For delicate items like stemware or fine china, consider using slightly thicker cardboard to provide structural integrity, ensuring the box supports the weight without collapsing.
Selecting the Right File Format for Your Tools
The download includes multiple file types, which is excellent for flexibility but can be confusing for beginners. Choosing the wrong format can result in poor print quality or incompatible cutting paths. Here is how to navigate the options:
- PDF Files: You receive two PDF files, one in inches and one in millimeters. These are ideal for standard home or office printers. They contain the full layout including cut lines and fold guides. Use these if you are cutting by hand with a craft knife or scissors.
- SVG Files: Two SVG files are included (inches and millimeters). These are vector graphics specifically optimized for electronic cutting machines like Cricut, Silhouette, Scan N Cut, and Pazzles. SVGs allow the machine to follow precise cut lines automatically, saving time and ensuring cleaner edges than manual cutting.
- DXF Files: Two DXF files are provided, ready for Silhouette software. DXF is a standard exchange format for CAD applications. If you use Silhouette Studio or similar vector editing software, DXFs offer robust compatibility for complex designs.
- EPS Files: Included for professional graphic design workflows. EPS files are useful if you intend to import the template into Adobe Illustrator or InDesign to add custom branding, logos, or decorative elements before exporting to PDF or SVG for cutting.
A common mistake is attempting to send an SVG file to a standard printer driver expecting it to behave like a PDF. While some drivers handle this, it is safer to stick to PDFs for direct printing and SVGs/DXF for machine cutting. Additionally, ensure your software settings match the unit system (inches vs. millimeters) specified in the file name to prevent scaling errors.
Material Selection and Assembly Best Practices
The template is blank, meaning it relies on you for aesthetics. You can customize it with your own designs, paste it onto decorative gift paper, or print directly onto colored cardstock. The quality of your final product depends heavily on the paper weight. Light printer paper (20 lb) will result in a flimsy box that cannot hold heavy items like pots or books. For a 4x4x4 inch box, we recommend cardstock between 65 lb and 110 lb. This weight provides enough rigidity to stand upright while remaining flexible enough to fold cleanly without cracking.
Assembly technique also impacts durability. When pasting the tabs, use a strong adhesive such as a glue stick or double-sided tape rather than liquid white glue, which can warp thin cardstock. Ensure that the tabs are fully adhered and smoothed down to prevent them from popping open during handling. If you are reusing the box—as the template allows—you should reinforce the corners with a small piece of clear tape on the inside after assembly.
Customization Tips for Professionals
For entrepreneurs and marketers, this template offers a low-cost way to test packaging ideas before investing in custom molded pulp or rigid boxes. Use the EPS files to overlay your brand colors and logos. Keep text away from the fold lines and cut edges to ensure readability and aesthetic balance. Remember that the lid fits over the base; if you are adding embellishments like ribbons or tags, account for their thickness when determining the inner clearance.
Maximizing Reusability and Efficiency
One of the strongest advantages of this digital download is its reusability. Unlike physical packaging supplies that degrade or get damaged, your digital file remains intact. You can print as many copies as you need, making it cost-effective for small batch production or event planning. Whether you are preparing wedding favors, holiday gifts, or retail products, you can scale your output instantly.
To maximize efficiency, set up a dedicated "assembly station" with all necessary tools within reach: a cutting mat, sharp blade, bone folder for crisp creases, and adhesive. Pre-cutting multiple sheets at once (if using a cutting machine) or batching the folding process can significantly reduce the time per unit. Treat the process like a mini-production line, and you will find that creating dozens of high-quality boxes takes less time than you might expect.
Final Checks Before You Start
Before committing to a large print run, always create a single test box. Print the PDF on regular paper first to check the fit of your intended contents. Once satisfied, switch to your final cardstock. Verify that your printer’s margins are not cropping the outer cut lines; most home printers have non-printable areas that could remove essential parts of the template. If using a cutting machine, run a test cut on scrap material to adjust pressure settings for your chosen paper weight.
By understanding the inner dimensions, selecting the appropriate file format for your equipment, and choosing the right materials, you can transform a simple digital file into a professional-grade packaging solution. The Box with Lid Template is more than just a DIY project; it is a versatile tool for creators who value customization, sustainability, and cost-efficiency. With careful preparation, you can produce beautiful, functional containers that enhance the presentation of any item, from delicate ceramics to sweet treats.